The most crucial factor with cryptocurrency is safety in an ever-evolving digital environment. Online data storage is becoming more and more vulnerable as more individuals use digital assets.
Currently, the best defense against these risks to your digital money is to use hardware wallets. Follow these steps to configure your Ledger Nano S hardware wallet. There are many Bitcoin and cryptocurrency enthusiasts in the UK that enjoy Ledger. Here are a few steps you may do to protect your online bank account.
What is the strong point of the Ledger Nano S hardware wallet?
Purchasing bitcoin with the Ledger Nano S, a unique hardware wallet, is much safer. Your web wallet, often called a "cold wallet," is where you can save your private keys if you have one. This is unrelated to it at all. If you disconnect from the internet, there is significantly less chance that someone will try to deceive you, hack you, or use malicious software. On our main page, you can purchase one.
Step by Step Instructions on How to Set Up Your Ledger Nano S
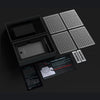
Step 1: Open the box and look inside to see what's inside
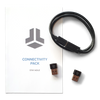
Make sure the box is still sealed when you get your Ledger Nano S. Make sure the following things are present by checking them carefully:
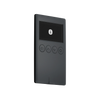
The Ledger Nano S hardware wallet has a USB port.
For backup, you need a recovery sheet for the keychain clip.

Step 2: connect your Ledger Nano S.
Use the USB wire that came with your Ledger Nano S to connect it to your computer's USB port.
A welcome message will be shown on the screen. Press the device's button to go on.

Step 3: Setting up your device
You can set up the device as if it were brand new, or you can restore it from a recovery phrase. To set this up as a new device, choose "Configure as new device."
Use the device's buttons to make a strong PIN code. This PIN will let you get into your wallet, and you'll need it every time you connect.

Step 4: Keep your data safe with a backup and recovery phrase
Your Ledger Nano S will come up with an escape phrase that is made up of 24 words. On the healing sheet that was given, write these words down. If your gadget gets lost, stolen, or hacked, this phrase is very important for getting your money back.
Next, make sure your healing phrase is correct.

Step 5: Add Ledger Live to the process
You can get Ledger Live software that works with your computer by going to the official Ledger website. Get the software installed and run it.

Step 6: Add Accounts
You can add the cryptocurrency apps you need for the coins you want to store on your Ledger Nano S by going to the "Manager" section of Ledger Live. After setting it up, go back to the main page and click "Add account." Just do what it says to do to connect your coin accounts to your hardware wallet.

Step 7: Moving Cryptocurrencies Around
Use the names that your Ledger Nano S gives you to send your cryptocurrency. These names can be found in the Ledger Live app under the account for that coin.

Keeping your cryptocurrencies offline with the Ledger physical wallet is safe and easy to use. By following this guide, you have now set up your Ledger Nano S, saved your recovery phrase, and can start moving your cryptocurrency.
Keep in mind that the safety of your investments depends on how carefully you follow best practices for security. Do not share your recovery phrase with anyone else. Keep it safe and private. Bad guys can't get to your coin if you have a Ledger Nano S. Take care of your crypto savings. Get yours now. Have fun holding!


